Installing ZMK
Unlike other keyboard firmwares, ZMK Firmware has been built from the ground up to allow users to manage their own keyboard configurations, including keymaps, specific hardware details, etc. all outside of the core ZMK Firmware source repository.
In addition to this, most users will not need to install any complicated toolchains or tools to build ZMK. GitHub Actions is used instead to automatically build the user's configured firmware for them.
If you run into any issues when following these instructions, please file an issue on GitHub or join us on Discord and let us know what went wrong so we can improve ZMK CLI and this guide.
Summary
The following steps can be taken to obtain an installable firmware image for your device, without the need to install any compiler or specialized toolchain. This is possible by leveraging GitHub Actions to build your firmware for you in the cloud, which you can then download and flash to your device.
Following the steps in this guide, you will:
- Install ZMK CLI, a command line tool for setting up ZMK.
- Create a new repository in GitHub that will contain your user config.
- Use ZMK CLI to clone the repo to your computer so you can edit the files.
- Select a keyboard to use and update the
build.yamlfile so GitHub will build firmware for that keyboard. - Add your own
.keymapand.conffiles to customize your keymap and enable/disable other ZMK features. - Commit and push the updates to trigger a new GitHub Action run to build the firmware.
Prerequisites
You will need to install a few tools before you can get started.
Many instructions in this guide use commands that need to be run in a terminal application. On most operating systems, the program is simply named "Terminal".
On Windows, get Windows Terminal from the Microsoft Store if it isn't already installed.
Install Git
Open a terminal and run the following command. If Git is already installed, it will print out a version number.
git --version
If it prints an error instead, install Git from https://git-scm.com/install/. Close and reopen your terminal and run the git --version command again to check if it installed correctly.
This guide will have you run several more git commands later. If you aren't familiar with Git, check out Learn The Basics Of Git In Under 10 Minutes to help you get started.
Set Up a GitHub Account
You will need a GitHub account. Create an account if you don't have one yet.
Next, you will need to authenticate your local Git installation with GitHub. There are several ways to do this, but the following two are the simplest. Pick whichever seems easiest to you:
Authenticate with GitHub CLI
Install GitHub CLI and run the following command in a terminal. Follow the instructions it gives you, and it will open GitHub in a web browser for you to log in.
gh auth login
Authenticate with a Personal Access Token
Create a personal access token and make sure to create it with the "workflow" scope option selected.
When running git commands later in this guide, Git will ask for your username and password. Enter your GitHub username, but do not enter your password. Instead, paste your access token where it asks for the password. You won't be able to see the token again after you create it, so keep the page open until you've done this and/or copy it to a secure location. If you lose the token, simply create another one.
Install uv
uv is a Python package manager which can install ZMK CLI and a supported version of Python if necessary. The instructions for installing uv differ depending on your operating system. Select the tab for your OS below.
If installation fails, see https://docs.astral.sh/uv/getting-started/installation/ for more detailed instructions and alternative installation methods.
Other package managers
ZMK CLI can also be installed with other Python package managers such as pipx. If you have a different package manager you prefer, install the "zmk" package and skip to Config Repo Setup.
- Linux
- Windows
- macOS
Open a terminal and run the following command:
curl -LsSf https://astral.sh/uv/install.sh | sh
If you get an error like "curl: command not found", try using wget:
wget -qO- https://astral.sh/uv/install.sh | sh
If that doesn't work either, install curl and try again. For example, on Ubuntu and other Debian-based Linux distributions, run:
sudo apt update
sudo apt install curl
curl -LsSf https://astral.sh/uv/install.sh | sh
If the install script prints the following, close and reopen your terminal.
To add $HOME/.local/bin to your PATH, either restart your shell or run:

    source $HOME/.local/bin/env (sh, bash, zsh)
    source $HOME/.local/bin/env.fish (fish)
Open a terminal and run the following command:
winget install --id astral-sh.uv -e --source winget
If this prints the text that is highlighted below, close and reopen your terminal.
Path environment variable modified; restart your shell to use the new value.
Command line alias added: "uvx"
Command line alias added: "uv"
Command line alias added: "uvm"
Successfully installed
Open a terminal and run the following command:
curl -LsSf https://astral.sh/uv/install.sh | sh
If the install script prints the following, close and reopen your terminal.
To add $HOME/.local/bin to your PATH, either restart your shell or run:

    source $HOME/.local/bin/env (sh, bash, zsh)
    source $HOME/.local/bin/env.fish (fish)
Install ZMK CLI
Finally, we'll install ZMK CLI. Open a terminal and run:
uv tool install zmk
I get an "executable already exists" error
Earlier versions of this guide used pipx. If you get an error like this...
error: Executable already exists: zmk.exe (use `--force` to overwrite)
...run the following commands to remove the pipx version and reinstall it with uv:
python3 -m pipx uninstall zmk
uv tool install zmk
This will likely print a message like warning: `/home/username/.local/bin` is not on your PATH. To fix that, run:
uv tool update-shell
Close and reopen your terminal to apply the changes, then run the following command. It should print a version number if everything installed correctly.
zmk --version
Config Repo Setup
Now that ZMK CLI is installed, you can use it to initialize a repository.
The zmk init command walks you through creating a GitHub repository, then clones it to your computer so you can edit it.
I already cloned my repo
If you have already created a repo and cloned it to your computer, for example with the old ZMK setup script, you do not need to do this. Instead, run the following command to point ZMK CLI to your repo, replacing /path/to/zmk-config with the actual path to the repo folder.
zmk config user.home "/path/to/zmk-config"
Then, skip to the next step.
Open a terminal and use the cd command to move to a folder where you'd like to place the ZMK files (it will create a new folder in this location), then run zmk init. For example:
cd ~/Documents
zmk init
Follow the instructions it gives you. If you already have a ZMK config repo on GitHub, select "Clone an existing repo" and enter its URL when prompted, for example:
Repository URL: https://github.com/myusername/zmk-config
Otherwise, select "Create a new ZMK config repo", and follow the instructions to create a new repo.
After this finishes, you will have a copy of the repo stored on your computer. All zmk commands will run on this repo (unless the working directory is inside a different repo). If you ever forget where the repo is located, you can run zmk cd to find it.
Add a Keyboard
To start building firmware for a new keyboard, run the following command:
zmk keyboard add
Follow the instructions to select a keyboard (and controller board if necessary). It will add the keyboard to your repo's build.yaml file so GitHub knows to build it, and it will create config/<keyboard>.keymap and config/<keyboard>.conf files for you to edit.
My keyboard isn't listed
If ZMK doesn't support your keyboard by default, you have two options:
Add a Module
ZMK can be extended with modules to add new keyboards. If someone has already created a module for your keyboard, run the following command to add it, replacing <url> with the URL of the Git repository for the module:
zmk module add <url>
For example, zmk module add https://github.com/cannonkeys/zmk-cannonkeys-keyboards would add support for CannonKeys keyboards.
Run zmk keyboard add again, and the new keyboards should appear in the list.
Create It Yourself
If nobody has created a module for your keyboard yet, or if it is your own custom design, you will need to set it up yourself. Your config repo is already set up as a module, so you can define new keyboards there. See ZMK's new keyboard shield guide for more information.
ZMK CLI can also help generate some of the boilerplate for defining a new keyboard:
zmk keyboard new
Edit Your Keymap and Configuration
See the customizing ZMK documentation for instructions on editing your keymap and configuring ZMK settings.
As a shortcut to open your keymap in a text editor, you can run the following command, replacing <keyboard> with the ID of the keyboard you chose earlier:
zmk code <keyboard>
If you have an editor like VS Code that can open a folder, you can also run the command without a keyboard ID to open your config repo directly:
zmk code
The first time you run this command, it will try to identify which text editors you have installed and ask you which one to use. If you want to change this later, change the core.editor setting.
Commit and Push to GitHub
After you've changed your keymap to your liking, you need to commit and push your changes.
Run the following commands to go to the repo directory, mark all your changed files to be added to the commit, create the commit, and push it to GitHub.
zmk cd
git add .
git commit -m "Initial commit"
git push
The text after -m is the "commit message", which gives a name to the commit. This is your first commit, so we're calling it "initial commit" here, but you can name it whatever you like. When you make more commits later, it's a good idea to use the commit message to write a description of the changes you made.
If the git push command asks you for a username and password, enter your GitHub username, but do not enter your password. Instead, paste your access token where it asks for the password. (Go back to the GitHub account setup instructions if you need to create a token.)
Install the Firmware
Download the Archive
Once you push a commit, GitHub will automatically run the action to build your keyboard firmware files. Run the following command to open the GitHub Actions page in your browser:
zmk download
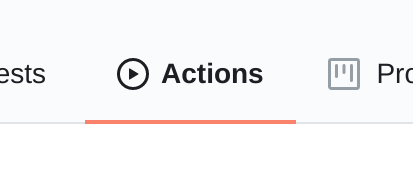
Or, you can manually open your GitHub repository in your browser and click the "Actions" tab at the top.
Once you have loaded the Actions tab, select the top build from the list. If the build was successful, the right side panel will include
a link to download the firmware upload:

If you see a red X instead of a link to download the firmware, the build failed, likely due to an error in your repo. See the troubleshooting page for help fixing the error. After making changes, commit and push again and GitHub will start a new build.
Once downloaded, extract the zip and you can verify it should contain one or more .uf2 or .hex files, which contain the firmware you need to write to your keyboard.
Flash UF2 Files
If your firmware contains a .uf2 file, then you flash the new firmware by putting the keyboard into bootloader mode and copying the file directly to it in file explorer.
First, put your keyboard into bootloader mode by double clicking the reset button (either on the MCU board itself, or the one that is part of your keyboard). The controller should appear in your OS as a new USB storage device.
Once this happens, copy the correct UF2 file (e.g. left or right if working on a split), and paste it onto the root of that USB mass storage device. Once the flash is complete, the controller should unmount the USB storage, automatically restart and load your newly flashed firmware. It is recommended that you test your keyboard works over USB first to rule out hardware issues, before trying to connect to it wirelessly.
For split keyboards, only the central half (typically the left side) will send keyboard outputs over USB or advertise to other devices over bluetooth. Peripheral half will only send keystrokes to the central once they are paired and connected. For this reason it is recommended to test the left half of a split keyboard first. Please refer to split keyboards documentation for more information.
Flash Hex Files
If your firmware contains a .hex file, then you will use DFU to flash the firmware. QMK Toolbox is an easy-to-use tool with support for DFU flashing.
Open QMK Toolbox, click the "Open" button, and select the correct .hex file (e.g. left or right if working on a split). Consult the documentation for your keyboard to figure out how to enter bootloader or DFU mode (often this is done by pressing a pair of buttons on the keyboard or by holding a specific key as you plug in the USB cable), and once QMK Toolbox detects the keyboard, click "Flash" to flash the firmware.
Wirelessly Connecting Your Keyboard
ZMK will automatically advertise itself as connectable if it is not currently connected to a device. You should be able to see your keyboard from the bluetooth scanning view of your computer or phone / tablet. It is reported by some users that the connections with Android / iOS devices are generally smoother than with laptops, so if you have trouble connecting, you could try to connect from your phone or tablet first to eliminate any potential hardware issues with bluetooth receivers.
ZMK supports multiple BLE “profiles”, which allows you to connect to and switch among multiple devices. Please refer to the Bluetooth behavior section for detailed explanations on how to use them. If you don't make use of the mentioned behaviors you will have issues pairing your keyboard to other devices.
Connecting Split Keyboard Halves
For split keyboards, after flashing each half individually you can connect them together by resetting them at the same time. Within a few seconds of resetting, both halves should automatically connect to each other. Please refer to the pairing section in the split keyboards documentation for more information.
If you have issues connecting the halves, make sure that both sides are getting powered properly through USB or batteries, then follow the recommended troubleshooting procedure. This is typically necessary if you swapped firmware sides between controllers, like flashing left side firmware to the same controller after flashing the right, or vice versa.